Checking your brake pads regularly is essential for vehicle safety and preventing costly repairs. Most drivers in the United States can inspect their brake pads at home using simple visual and auditory methods without specialized tools. This comprehensive guide covers multiple inspection techniques, warning signs of worn brake pads, and specific procedures for popular vehicles including Toyota Corolla, BMW, Mazda CX-5, and Hyundai i10. Whether you prefer checking through wheel spokes or removing wheels for detailed inspection, you’ll learn professional methods used by mechanics across America in 2026.
Why Regular Brake Pad Inspection Matters
Your vehicle’s brake pads are consumable safety components that wear down with every stop you make. In the United States, worn brake pads contribute to approximately 22% of vehicle accidents caused by mechanical failure, according to 2026 National Highway Traffic Safety Administration data. Regular inspection helps you identify wear before complete brake failure occurs, preventing dangerous situations and expensive rotor damage.
Most brake pads in modern vehicles last between 25,000 and 70,000 miles depending on driving habits, vehicle weight, and pad material composition. Urban drivers who frequently stop and start typically experience faster brake wear than highway commuters. Checking your brake pads every 6,000 miles or during routine oil changes ensures you catch problems early. The minimum safe thickness for brake pads is 3 millimeters, though replacement is recommended at 4 millimeters to maintain optimal stopping power.
Visual Signs Your Brake Pads Are Worn Out
Before performing physical inspection, several visual indicators can alert you to brake pad problems. Understanding these warning signs helps you determine when immediate inspection is necessary and prevents potential brake system failure on American roads.
Dashboard Warning Lights and Indicators
Modern vehicles manufactured after 2020 typically include electronic brake wear sensors that trigger dashboard warning lights when pad thickness reaches critical levels. The brake warning light may appear as a circle with exclamation point or text reading “BRAKE” or “BRAKE PAD.” When this light illuminates while driving with the parking brake released, your brake pads likely need immediate attention. Some luxury vehicles like BMW and Mercedes-Benz display specific brake pad percentage remaining on the instrument cluster, giving precise wear information without physical inspection.
Auditory Warning Signals
Brake pads contain built-in wear indicators that produce distinctive sounds when pads reach minimum thickness. A high-pitched squealing or screeching noise when applying brakes indicates the metal wear indicator is contacting the rotor, signaling replacement is needed soon. Grinding sounds suggest the pad material is completely gone and metal backing plates are damaging rotors, requiring immediate professional attention. In quiet environments, you might hear these sounds even without applying brakes as the wear indicator drags against the spinning rotor. These auditory warnings are engineered safety features standard on virtually all brake pads sold in the United States since 2015.
How to Check Brake Pads Without Removing Wheels
The quickest method for checking brake pads at home involves inspecting through wheel spokes without removing tires. This approach works best with alloy wheels that have open spoke designs common on most passenger vehicles in America. You’ll need a flashlight and the ability to turn your steering wheel while the vehicle is parked.
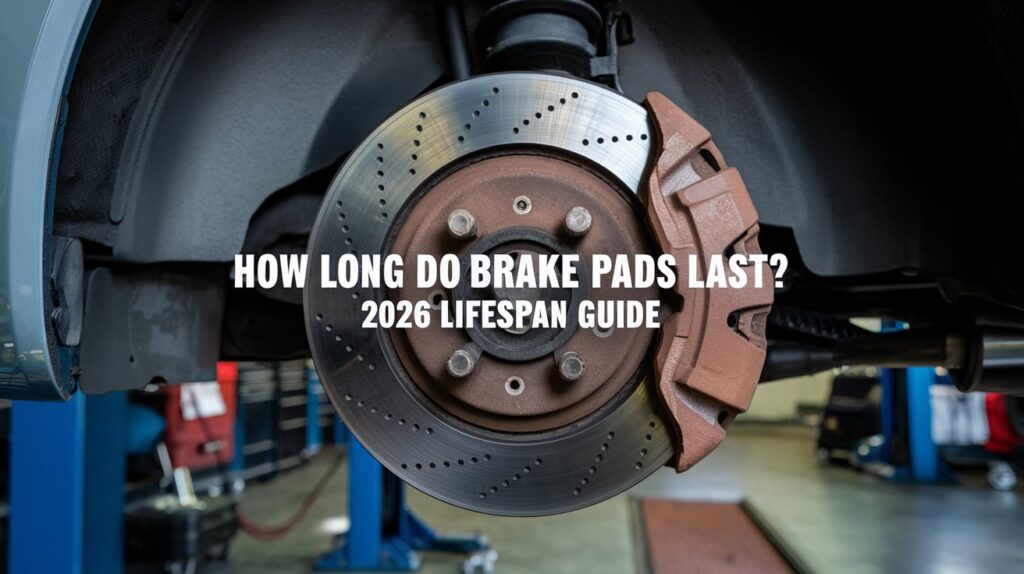
Start by parking your vehicle on level ground and turning off the engine. For front brake pads, turn the steering wheel fully to the right to inspect the left front brake, or fully left to inspect the right front brake. This angled position provides better visibility through the wheel spokes. Shine your flashlight through the spokes toward the brake caliper assembly, which sits over the brake rotor like a clamp. The brake pad is the flat material pressed against the shiny metal rotor surface.
Measure the visible pad thickness with your eyes, comparing it to common reference points. A healthy brake pad appears at least as thick as a standard pencil or approximately 6-8 millimeters for new pads. If the pad looks thinner than a quarter inch or about 6 millimeters, schedule replacement soon. Pads worn to 3 millimeters or less require immediate replacement. Check both the inner and outer pads if visible, as they may wear unevenly. For rear brake pads, the process is similar but may be more difficult due to wheel well design on some vehicles. Repeat the inspection on all four wheels to assess overall brake system condition.
Detailed Inspection Methods With Wheel Removal
For the most accurate brake pad assessment, removing the wheel provides complete access to the entire brake assembly. This method is recommended for comprehensive annual inspections and when visual checks through wheel spokes are inconclusive.
Safety Preparation and Tools Needed
Before lifting your vehicle, gather essential safety equipment: a hydraulic floor jack rated for your vehicle weight, two jack stands with minimum 3-ton capacity, a lug wrench, wheel chocks, and a flashlight or work light. Park on firm, level ground and engage the parking brake. Place wheel chocks behind the tires that will remain on the ground to prevent rolling. Consult your owner’s manual for proper jacking points specific to your vehicle model. Never work under a vehicle supported only by a jack, as hydraulic jacks can fail. Always use jack stands positioned at manufacturer-specified support points. In 2026, automotive safety experts report that proper jack stand use prevents over 3,000 injuries annually in the United States.
Step-by-Step Wheel Removal Inspection
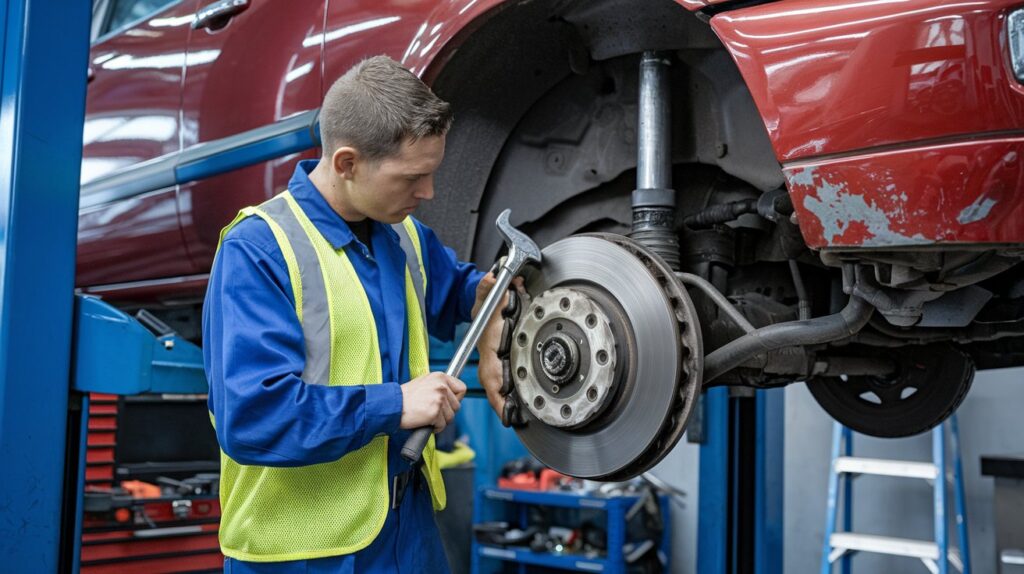
Loosen the lug nuts one-quarter turn while the wheel is still on the ground for stability. Position your jack at the designated jacking point and raise the vehicle until the tire clears the ground by 2-3 inches. Immediately place a jack stand under the vehicle frame and lower the jack until the vehicle rests securely on the stand. Remove the lug nuts completely and pull the wheel straight toward you to remove it.
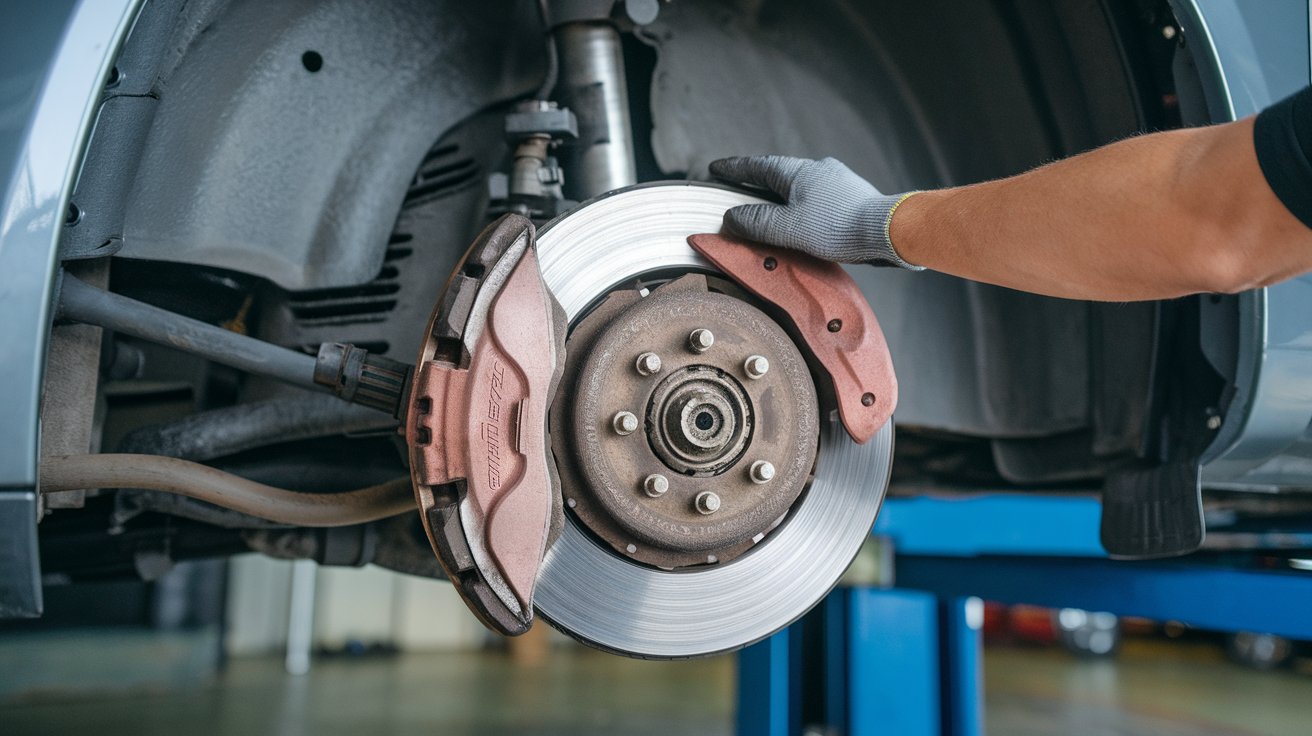
With the wheel removed, the entire brake caliper assembly is visible. The brake rotor is the large metal disc, and the caliper sits over it like a clamp. On most vehicles, you’ll see the outer brake pad immediately. The brake pad is the rectangular friction material, typically dark gray or black, pressed against the rotor. Measure the pad thickness from the backing plate to the friction surface. Use a ruler or brake pad thickness gauge for precision, though experienced mechanics often estimate visually. New brake pads measure 8-12 millimeters depending on vehicle type. Replace pads when thickness reaches 4 millimeters or less.
To inspect the inner brake pad, look through the caliper inspection window if equipped, or carefully look behind the caliper from above or below. Some vehicles require removing a rubber inspection plug to view the inner pad. Check for uneven wear patterns, which indicate caliper or slide pin problems requiring professional attention. Examine the brake rotor surface for deep grooves, scoring, or blue discoloration indicating overheating. These conditions often necessitate rotor replacement along with brake pads.
How to Check Brake Pads on Specific Vehicles
Different vehicle manufacturers use varying brake system designs that affect inspection methods. Understanding your specific vehicle’s configuration ensures accurate assessment and prevents damage during inspection.
How to Check Brake Pads Toyota Corolla
The Toyota Corolla, America’s best-selling compact sedan with over 265,000 units sold in 2025, features straightforward brake inspection. Corolla models from 2020-2026 use single-piston floating calipers on front brakes and either disc or drum brakes on the rear depending on trim level. The front brake pads are easily visible through the five-spoke alloy wheels standard on most trims. Turn the steering wheel fully to access better viewing angles through the spokes. Toyota Corolla brake pads typically last 40,000-60,000 miles with normal driving conditions. The brake pad wear indicator on Corollas produces a squealing sound at approximately 3 millimeters remaining thickness. For models with rear disc brakes, inspection follows the same procedure as front brakes. Corollas with rear drum brakes require drum removal for inspection, best left to professionals during routine maintenance.
How to Check Brake Pads BMW
BMW vehicles utilize sophisticated electronic brake monitoring systems that display pad wear percentage on the iDrive screen or instrument cluster. To access this information, navigate to Vehicle Info or Service menu depending on your model year. The system uses sensors embedded in the brake pads that monitor wear in real-time. Despite electronic monitoring, visual inspection remains valuable for identifying uneven wear or damage. BMW brake calipers on 3-Series, 5-Series, and X3 models feature inspection windows on the caliper body allowing inner pad visibility without wheel removal. The front brake pads on BMW vehicles typically wear faster than rears due to the front-weight bias and performance-oriented brake bias. BMW recommends inspection every 10,000 miles and typical pad life ranges from 30,000-50,000 miles depending on driving style. Performance models with M Sport packages may experience accelerated wear due to more aggressive pad compounds and driving patterns.
Understanding Brake Pad Thickness Standards
Accurate brake pad measurement determines whether replacement is necessary or if continued use is safe. Professional mechanics and automotive engineers use standardized thickness guidelines to assess brake pad condition across all vehicle types in the United States.
New brake pads typically measure between 8 and 12 millimeters thick depending on vehicle weight and performance requirements. Heavy-duty trucks and performance vehicles often use thicker pads to handle increased thermal loads and stopping forces. As you drive, friction converts kinetic energy to heat, gradually wearing away the pad material. Most manufacturers recommend replacement when pad thickness reaches 4 millimeters to maintain optimal stopping performance and prevent rotor damage. The legal minimum thickness in most states is 3 millimeters, though operating at this level significantly increases stopping distances and accident risk.
When measuring brake pad thickness, always measure from the backing plate to the friction surface, not including the backing plate itself. The backing plate is the metal foundation that doesn’t wear and typically measures 3-4 millimeters thick. A common mistake is measuring total thickness including the backing plate, which provides inaccurate wear assessment. Digital calipers provide the most accurate measurements, though a standard ruler works adequately for home inspection. Check thickness at multiple points across the pad surface to identify uneven wear patterns that indicate mechanical problems requiring professional diagnosis.
How Much Do Brake Pads Cost in 2026
Understanding brake pad replacement costs helps you budget for this essential maintenance and avoid price gouging at repair shops. Prices vary significantly based on vehicle type, pad quality, and whether you perform DIY installation or hire a professional.
For economy and mid-size vehicles like the Toyota Corolla, brake pad prices range from 35 to 75 dollars per axle for standard replacement pads from reputable brands like Wagner, Raybestos, or ACDelco. Premium ceramic pads for the same vehicles cost 60 to 120 dollars per axle and offer quieter operation, less dust, and longer life. If hiring a professional mechanic, expect total costs including parts and labor to range from 150 to 300 dollars per axle at independent shops, or 200 to 400 dollars at dealerships. Labor typically accounts for 80 to 150 dollars of the total cost, as brake pad replacement requires 1-2 hours per axle.
Luxury vehicles like BMW require more expensive pads due to performance specifications and tighter tolerances. BMW brake pads cost 80 to 200 dollars per axle for quality aftermarket options, while genuine BMW parts range from 150 to 350 dollars per axle. Professional installation costs 200 to 500 dollars per axle at independent European specialists, or 300 to 700 dollars at BMW dealerships. The Mazda CX-5, a popular compact SUV, falls between economy and luxury pricing with pad costs of 50 to 110 dollars per axle and total professional installation ranging from 180 to 350 dollars per axle.
For the Hyundai i10, which isn’t officially sold in the United States but is driven by some import enthusiasts, brake pads cost approximately 30 to 60 dollars per axle when sourced internationally. However, finding qualified mechanics familiar with this model may be challenging in America. Budget an additional 20-40 percent for shipping and potential customs fees when ordering international brake components. Regardless of vehicle type, replacing brake pads in matched axle sets rather than individual wheels ensures balanced braking performance and prevents vehicle pull during stops.
Common Brake Pad Wear Patterns and What They Mean
Examining brake pad wear patterns reveals important information about your brake system’s mechanical health beyond simple thickness measurements. Uneven wear indicates problems requiring correction to prevent premature pad replacement and ensure safe braking performance.
Even Wear Across Pad Surface
Uniform wear across the entire brake pad surface indicates proper brake system function. The pad material should wear evenly from top to bottom and side to side, creating a smooth surface parallel to the rotor. This pattern confirms that calipers are applying equal pressure, slide pins move freely, and rotors are flat without warping. Even wear typically results from proper brake maintenance, quality components, and appropriate driving habits. When you observe this pattern during inspection, no corrective action is needed beyond normal pad replacement when thickness reaches 4 millimeters.
Tapered or Angled Wear
When one edge of the brake pad is significantly thinner than the other, creating a wedge shape, the caliper slide pins are likely seized or corroded. This condition causes the caliper to apply uneven pressure, wearing one side faster than the other. Tapered wear requires immediate attention because it indicates the caliper isn’t floating properly, which reduces braking efficiency and can cause vehicle pull during stops. Correction involves cleaning and lubricating slide pins with high-temperature synthetic brake grease, or replacing the caliper if pins are severely corroded. Ignoring tapered wear leads to rapid pad consumption and potentially expensive rotor damage.
Inner Pad Wearing Faster Than Outer Pad
Significant thickness difference between inner and outer pads suggests a sticking caliper piston that doesn’t fully retract after braking. This condition causes the inner pad to drag continuously against the rotor, generating excessive heat and accelerated wear. You might notice reduced fuel economy, a burning smell after driving, or the wheel feeling hot to touch after short trips. Caliper piston problems typically result from damaged dust boots allowing moisture contamination of the piston bore, causing corrosion and binding. Resolution requires caliper rebuild or replacement, along with fresh brake fluid to remove moisture from the system. This wear pattern is particularly common on vehicles over five years old in regions using road salt during winter months.
DIY Brake Pad Inspection Safety Guidelines
Performing brake inspections at home saves money and provides valuable knowledge about your vehicle’s condition, but safety must remain the top priority. Following proper procedures protects you from injury and prevents vehicle damage during inspection.
Always work on a firm, level surface such as concrete or asphalt, never on soft ground, gravel, or inclined driveways where jack stands might shift. Ensure the vehicle is in park with the parking brake engaged before jacking, and place wheel chocks on the wheels remaining on the ground. Use only quality jacks and jack stands rated for at least 50 percent more weight than your vehicle’s curb weight to provide adequate safety margin. According to the Bureau of Labor Statistics, improper jacking procedures cause over 4,800 injuries annually in the United States, with the majority occurring during DIY automotive maintenance.
Never rely solely on a hydraulic jack to support the vehicle, as these devices can fail unexpectedly due to seal failure or slow hydraulic leak. Always position jack stands at manufacturer-specified support points, typically reinforced frame sections or designated jacking points shown in your owner’s manual. Avoid placing stands on sheet metal body panels, suspension components, or exhaust systems. Before crawling under the vehicle, shake it firmly to ensure stability on the jack stands. Keep children and pets away from the work area, and avoid distractions while the vehicle is elevated.
Wear safety glasses to protect your eyes from brake dust, which may contain harmful materials including metallic particles and, in older vehicles, asbestos fibers. Though asbestos brake pads were phased out in the United States by 2004, some imported or very old vehicles may still have them. Use a spray bottle with water to dampen brake components before inspection, which prevents dust from becoming airborne. Wash hands thoroughly after handling brake components, and avoid touching your face during inspection. If you feel uncertain about any procedure or encounter unexpected conditions like seized bolts or damaged components, consult a professional mechanic rather than forcing repairs beyond your skill level.
When to Replace Brake Pads Versus Resurface Rotors
Understanding the relationship between brake pads and rotors helps you make informed decisions about which components need service. These parts work as a system, and the condition of one affects the other’s performance and longevity.
Replace brake pads when thickness reaches 4 millimeters or less, when wear indicators produce squealing sounds, or when uneven wear patterns appear regardless of remaining thickness. Automotive engineers recommend replacing pads in complete axle sets to maintain balanced braking, even if one side shows more wear than the other. Installing new pads on only one wheel causes unequal braking force that can make the vehicle pull to one side during stops, creating dangerous handling characteristics especially in emergency situations.
Inspect brake rotors whenever replacing pads, as rotor condition significantly impacts new pad break-in and overall braking performance. Rotors should have smooth, uniform surfaces without deep grooves, scoring, or heat discoloration. Minor surface imperfections and light scoring are normal and acceptable with proper pad bedding procedures. However, rotors with grooves deeper than 1 millimeter, severe scoring, heat cracks, or blue discoloration from overheating should be replaced or resurfaced depending on remaining thickness.
Most modern vehicles use thinner rotors than older models to reduce weight for improved fuel economy. These thin rotors have minimal material available for resurfacing, often making replacement more cost-effective than machining. Measure rotor thickness with a micrometer and compare to the minimum thickness specification stamped on the rotor hub or listed in your service manual. Rotors worn within 1 millimeter of minimum specification should be replaced rather than resurfaced, as they’ll quickly reach minimum thickness through normal wear after resurfacing. In 2026, rotor replacement costs typically range from 40 to 150 dollars each depending on vehicle type, while resurfacing costs 15 to 25 dollars per rotor at most machine shops.
Brake Pad Materials and Performance Differences
Choosing the correct brake pad material for your driving style and vehicle type affects stopping performance, noise levels, dust production, and service life. Understanding material differences helps you select optimal pads during replacement.
Ceramic Brake Pads
Ceramic brake pads contain ceramic fibers, bonding agents, and small amounts of metal to create a durable, quiet friction material popular on passenger vehicles in America. These pads produce less brake dust than other materials, keeping wheels cleaner and reducing environmental particulate emissions. Ceramic pads operate quietly with minimal squealing or noise, making them ideal for daily drivers who prioritize comfort. They perform well across a broad temperature range and maintain consistent friction characteristics in both cold and hot conditions. However, ceramic pads typically cost 30-50 percent more than semi-metallic alternatives and may require slightly longer stopping distances in extreme cold weather below 20 degrees Fahrenheit. Most vehicle manufacturers install ceramic pads as original equipment on new cars sold in the United States since 2020.
Semi-Metallic Brake Pads
Semi-metallic pads contain 30-65 percent metal including steel, iron, and copper embedded in organic material. These pads excel in high-temperature performance, making them suitable for towing, mountain driving, and spirited driving scenarios. Semi-metallic brake pads offer excellent heat dissipation and maintain friction even when hot, preventing brake fade during repeated hard stops. They typically last longer than organic pads and cost less than ceramic alternatives. Disadvantages include increased brake dust production, more noise including possible squealing, and higher rotor wear rates due to the abrasive metal content. These pads work best on trucks, SUVs, and performance vehicles where maximum stopping power and heat resistance outweigh comfort considerations. They require proper break-in procedures to transfer a friction layer onto rotors for optimal performance.
Organic and Low-Metallic Brake Pads
Organic brake pads, also called NAO (Non-Asbestos Organic), contain materials like rubber, glass, Kevlar, and resin with minimal metal content. These pads operate very quietly and produce minimal dust, but wear faster and offer reduced high-temperature performance compared to ceramic or semi-metallic options. Organic pads cost less than other types but require more frequent replacement, typically every 25,000-35,000 miles. They work well for light-duty vehicles driven primarily in city conditions without towing or mountain driving. Low-metallic pads contain 10-30 percent metal and bridge the gap between organic and semi-metallic designs, offering improved heat performance versus pure organic pads while maintaining relatively quiet operation. These intermediate options suit budget-conscious drivers seeking better performance than organic pads without the noise and dust of full semi-metallic designs.
Extending Brake Pad Life Through Proper Driving Habits
Your driving technique significantly impacts brake pad longevity, with proper habits extending service life by 30-50 percent compared to aggressive driving. Implementing these practices reduces maintenance costs and improves vehicle safety over time.
Practice anticipatory driving by observing traffic conditions ahead and coasting to slow down rather than maintaining speed until the last moment. When you see a red light or stopped traffic ahead, remove your foot from the accelerator early and allow engine braking to reduce speed before applying brakes. This technique reduces the amount of friction braking needed, saving brake pad material and reducing rotor heat cycling that leads to warping. Highway driving naturally extends brake pad life compared to city driving because fewer stops are required per mile traveled.
Avoid riding the brake pedal with your left foot or resting your foot on the pedal while driving, as even light contact causes continuous pad wear and heat generation. Use engine braking when descending hills by downshifting to a lower gear, which allows engine compression to control vehicle speed and reduces brake system loads. Modern vehicles with automatic transmissions often include manual shift modes or low gear selections specifically designed for hill descent control. On vehicles equipped with cruise control, use this feature on flat highways to maintain steady speeds without constant throttle and brake adjustments.
Reduce vehicle weight by removing unnecessary cargo from the trunk or truck bed, as every 100 pounds of additional weight increases braking loads and accelerates pad wear. Aggressive acceleration followed by hard braking, common in city traffic, rapidly consumes brake material and generates excessive heat. Instead, accelerate smoothly and maintain consistent speeds when possible. Plan your trips to avoid rush hour traffic when feasible, as stop-and-go conditions dramatically increase brake usage compared to free-flowing traffic. These simple driving habit changes can extend brake pad life from 40,000 miles to 60,000 miles or more on typical passenger vehicles in United States driving conditions.
Related video about how to check brake pads
This video complements the article information with a practical visual demonstration.
Frequently Asked Questions
How do I know if my brake pads are worn out?
Multiple indicators reveal worn brake pads including squealing or grinding noises when braking, dashboard brake warning lights, reduced braking performance requiring more pedal pressure, and vehicle pulling to one side during stops. Visual inspection showing pad thickness below 4 millimeters confirms replacement is needed. Most brake pads contain wear indicators that produce high-pitched squealing sounds when pads reach 3 millimeters thickness. If you hear grinding metal-on-metal sounds, the pads are completely gone and you’re damaging the rotors, requiring immediate professional attention. Modern vehicles often display brake pad wear percentage on the instrument cluster or infotainment screen.
How much are new brake pads for a Mazda CX-5?
Brake pads for a Mazda CX-5 cost between 50 and 110 dollars per axle for quality aftermarket brands including Wagner, Raybestos, and Bosch in 2026. Genuine Mazda OEM brake pads range from 90 to 160 dollars per axle. If hiring a professional mechanic, total cost including parts and labor ranges from 180 to 350 dollars per axle at independent shops, or 250 to 450 dollars at Mazda dealerships. Front brake pads typically wear faster than rear pads and may need replacement more frequently. Ceramic brake pads cost more than semi-metallic options but produce less dust and operate more quietly, making them popular for this SUV.
How can I check my brake pads at home?
You can check brake pads at home without removing wheels by looking through wheel spokes with a flashlight while the vehicle is parked. Turn the steering wheel fully left or right to improve visibility of the front brakes. The brake pad is the dark material pressed against the shiny metal rotor inside the wheel. Compare pad thickness to common references, a healthy pad appears at least as thick as a pencil or 6 millimeters. For more accurate inspection, safely jack up the vehicle, support it with jack stands, remove the wheel, and directly measure pad thickness from the backing plate to the friction surface using a ruler. Replace pads when thickness reaches 4 millimeters or less.
What is the minimum safe thickness for brake pads?
The minimum safe brake pad thickness is 3 millimeters according to most state regulations and automotive safety standards, though replacement is strongly recommended at 4 millimeters to maintain optimal braking performance. New brake pads measure 8-12 millimeters thick depending on vehicle type. Operating with pads at minimum thickness significantly increases stopping distances, accelerates rotor wear, and risks complete brake failure if wear continues. Professional mechanics and vehicle manufacturers recommend inspection every 6,000-10,000 miles and replacement before reaching minimum thickness. Emergency replacement is required if pads measure below 3 millimeters or if grinding noises indicate complete pad material loss.
Do front and rear brake pads wear at the same rate?
Front brake pads wear significantly faster than rear pads on most vehicles because the front brakes handle 60-70 percent of braking force due to weight transfer during deceleration. On typical passenger vehicles, front brake pads require replacement every 30,000-50,000 miles while rear pads often last 60,000-80,000 miles. However, vehicles with rear-wheel drive or specific brake bias tuning may show different wear patterns. Electronic stability control and anti-lock brake systems can affect individual wheel brake usage, creating variations in wear rates between left and right sides. Always inspect all four wheels during brake service to accurately assess the entire system condition and plan appropriate maintenance.
Can I replace brake pads myself or should I hire a mechanic?
Mechanically inclined individuals with basic tools can successfully replace brake pads as a DIY project, saving 80-150 dollars in labor costs per axle. The job requires a jack, jack stands, lug wrench, C-clamp or brake piston tool, and basic hand tools. However, brake system work directly impacts vehicle safety, so uncertain individuals should hire professional mechanics. Potential complications include seized caliper bolts, damaged brake lines, incorrect pad installation, and improper brake bleeding if the system is opened. Modern vehicles with electronic parking brakes or brake-by-wire systems often require specialized scan tools to retract calipers, making professional service necessary. First-time DIY brake jobs typically take 2-4 hours per axle compared to 1-1.5 hours for experienced mechanics.
| Inspection Method | Difficulty Level | Best Application |
|---|---|---|
| Visual through wheel spokes | Easy – 5 minutes | Quick routine checks every oil change |
| With wheel removal | Moderate – 30 minutes | Detailed annual inspection and precise measurement |
| Dashboard warning lights | Very Easy – Immediate | Electronic monitoring on 2020+ vehicles |
| Auditory indicators | Very Easy – Continuous | Automatic warning when pads reach 3mm |
| Professional inspection | N/A – 20 minutes | When DIY inspection shows concerning wear patterns |